How to Build custom ERC-1155 NFT Collection using thirdweb

Actively looking for Smart Contract Developer, DevRel and Technical Writer Role.
ex Smart Contract Developer @Lighthouse | Technical Writer | @QuickNode Ambassador | @chainlink Developer Expert & Community Advocate | Contributor @Developer_DAO, @LearnWeb3DAO and @eden
Built over 70 dapps and published 19 tutorials in web3
In this Tutorial, we will build a custom ERC-1155 NFT Bundle Collection using Thirdweb ContractKit and Deploy tool. Instead of Minting all the NFTs in one go. We allow users to mint NFT from any NFT bundle Collection one by one. We also set a maximum supply of NFTs; one user can mint only one NFT.
Overview
ERC-1155 has emerged as a gold standard for creating NFTs; every major marketplace lists new tokens as an ERC-1155 standard. We will use Thirdweb ContractKit to build our smart contract along with some custom logic. We allow users to mint only one NFT per NFT Bundle collection.
Why Use ContractKit?
Each feature you implement in your smart contracts unlocks functionality in both the thirdweb dashboard and SDK to help you build applications on top of them.
For example, if you implement the ERC721Base contract, you'll unlock the mint button in the dashboard and can use the mint function in the SDK; which automatically uploads and pins your metadata to IPFS!
What is ERC-1155?
ERC1155 is a multi-token standard that allows the creation of fungible, non-fungible, and semi-fungible tokens all in one contract. Before ERC-1155, if a use case needed both ERC-20 (fungible) and ERC-721 (non-fungible) tokens, you would need to create separate contracts to achieve this. ERC1155 also allows for multiple NFT collections to be launched in just one smart contract instead of creating a different contract for each collection; this increases efficiency in smart contract construction and minimizes the transaction count, which is very important as it consumes less blockchain space. With ERC-1155, batch transfer of tokens is possible instead of transferring a token to a single address in previous standards.
A prevalent example of the ERC-1155 application is blockchain-based decentralized games, which need coins and collectibles, so ERC-1155 has become a standard there. ERC1155 has also become a standard in the NFT space.
The previous ERC-721 had a one-to-one mapping of the token id with the address. ERC-1155 has a rather complex mapping where the address in a combination of token ID is mapped to the balance of the token.
Setting up the environment.
First of all, we will setup our environment and install dependencies. To get started, run the command below to create a new project by opening the terminal of your preferred IDE.
npx thirdweb create --contract
You will get something like this:
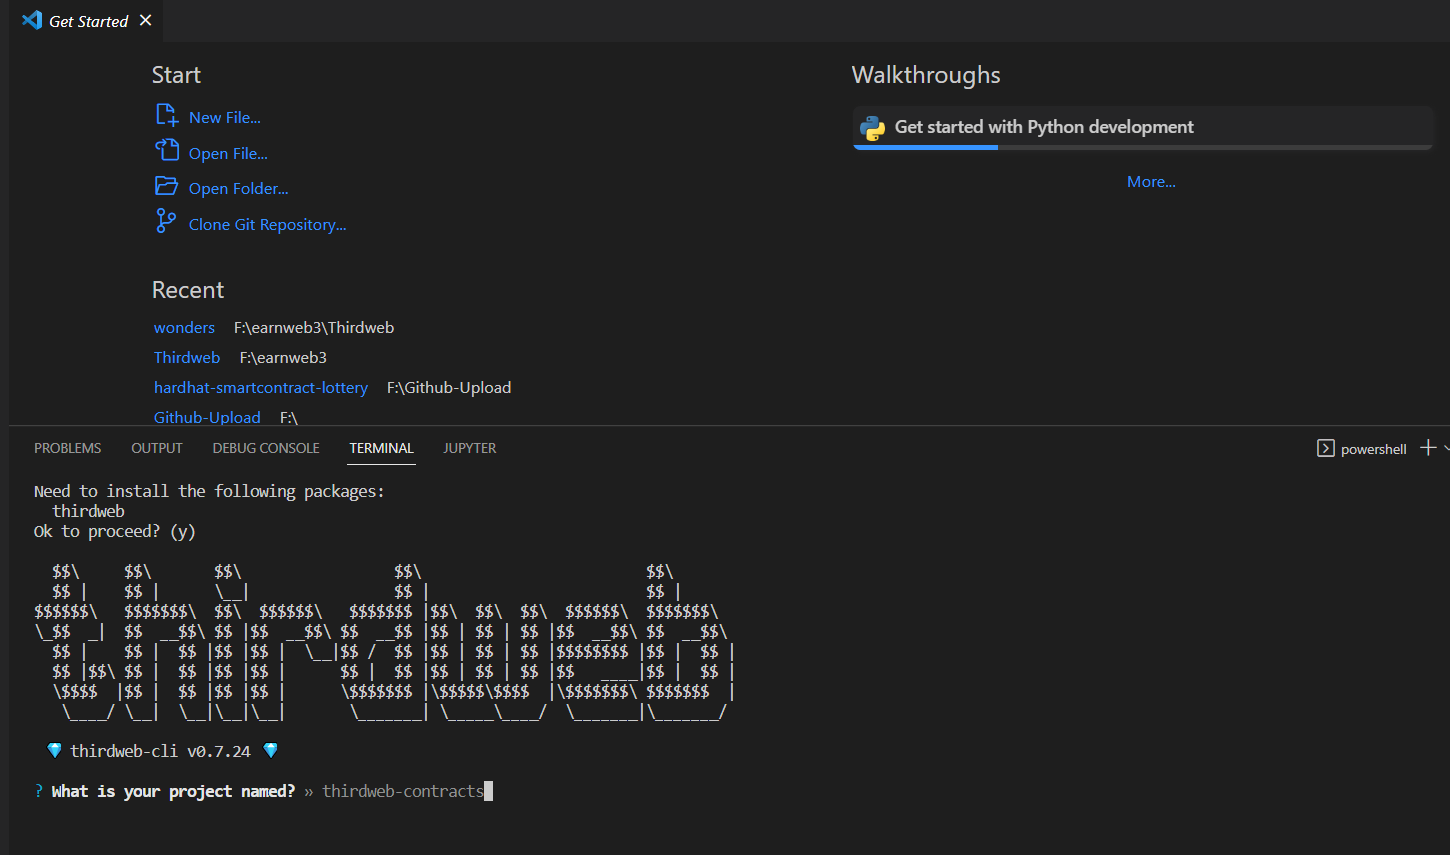
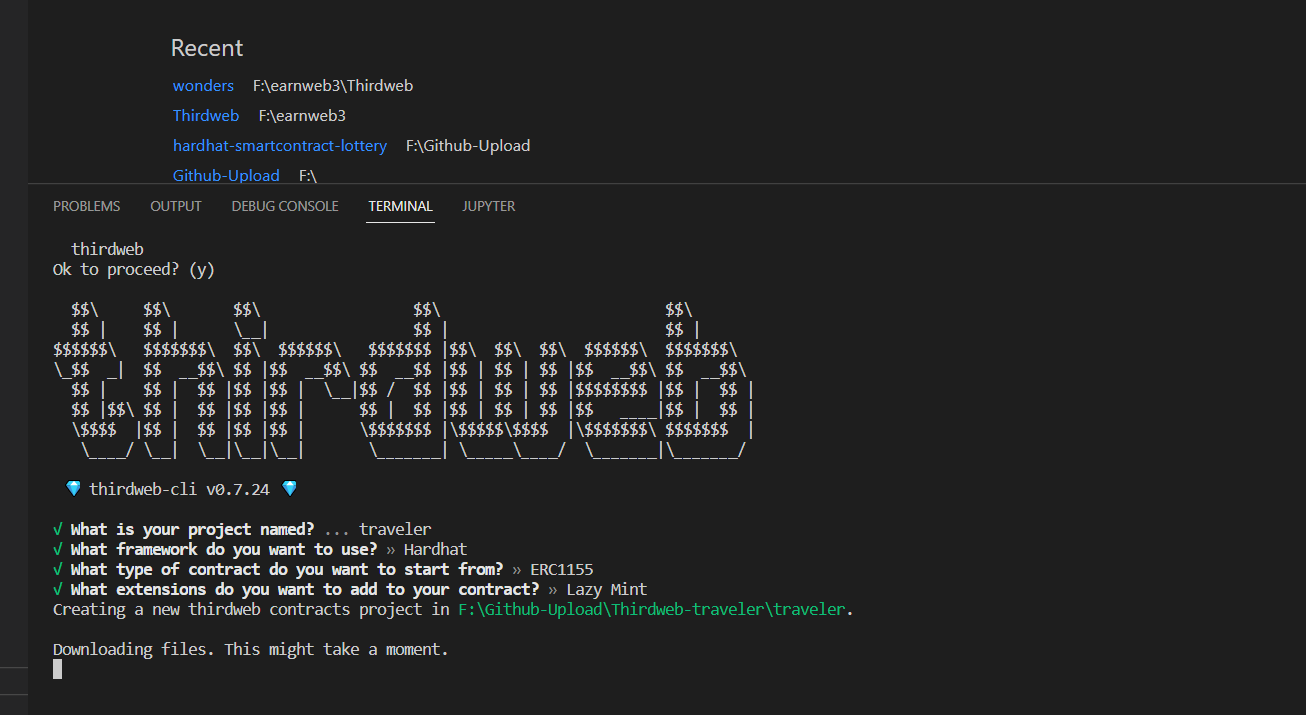
Now enter your preferred details. For this tutorial, I have selected the below setting
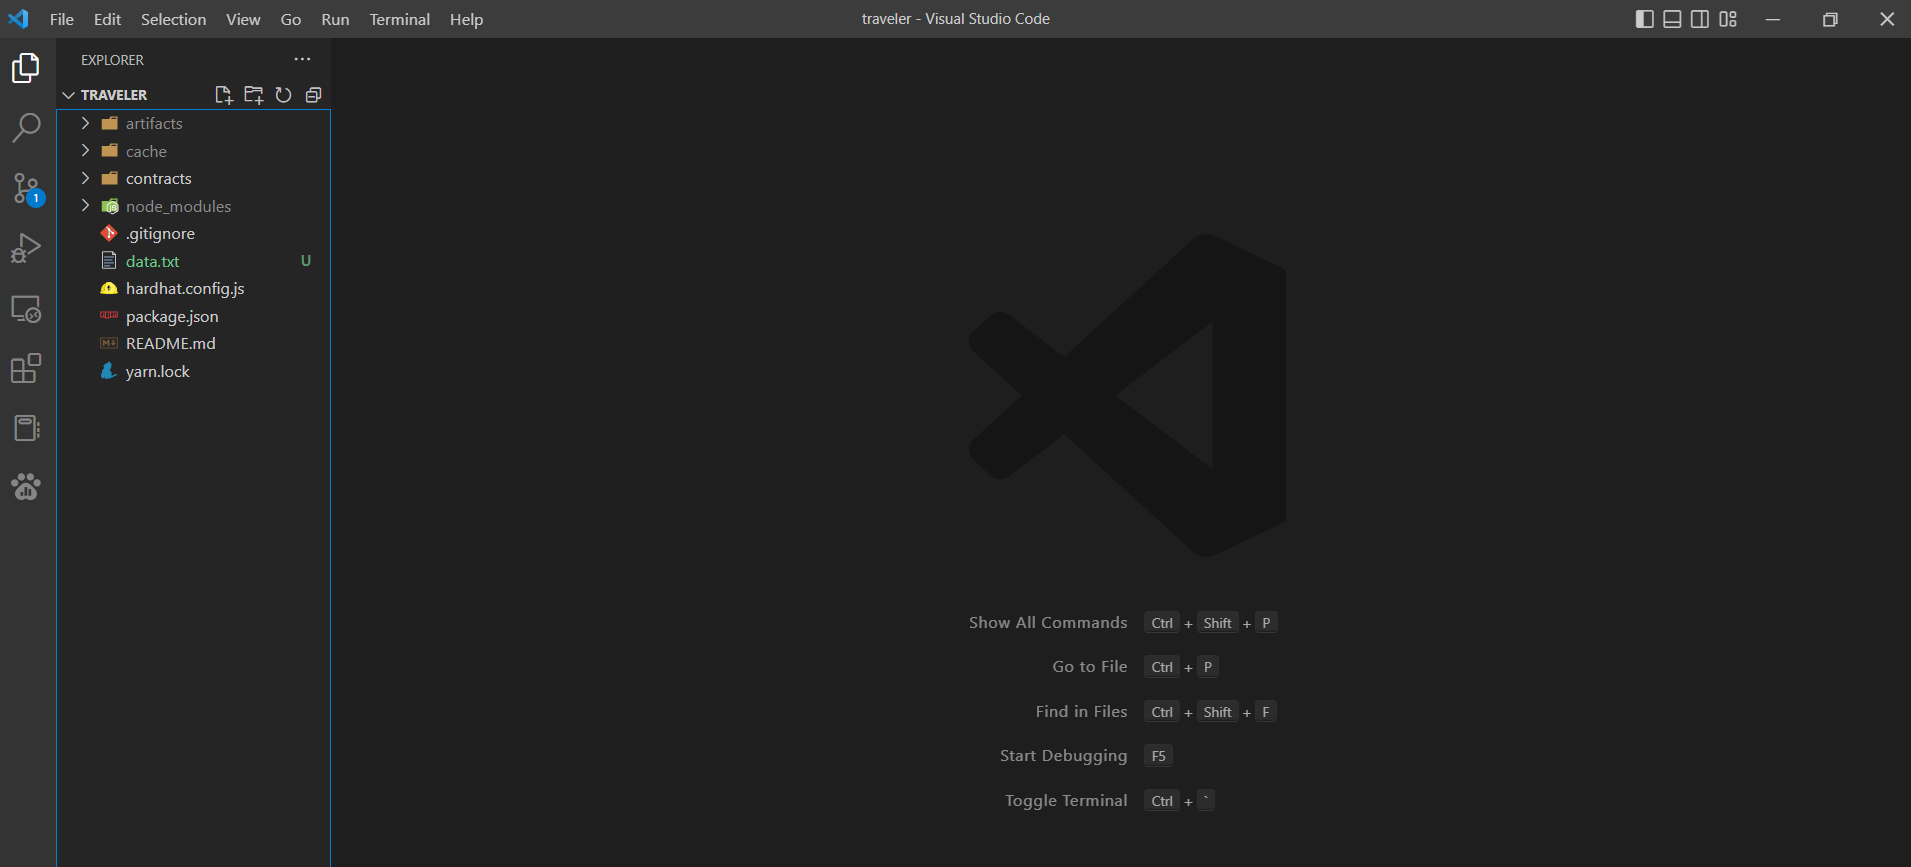
After completion, navigate and open the new directory by running the following command.
cd dapp-name

code .
You will see this type of file structure.
Now open the contracts directory and select the contract.sol file. You will see the demo code. Now copy the below smart contract code and replace it with the demo code.
// SPDX-License-Identifier: MIT

/** @author Aayush gupta
 * `TravelQuest` is a POV (Proof-of-visit) dapp that allow user to mint 1 NFT per collection
 * using `ERC1155LazyMint` library of `ThirdWeb`.
 */
pragma solidity ^0.8.0;


/**
 * Importing `ERC1155LazyMint` library of `ThirdWeb`.
 */
import "@thirdweb-dev/contracts/base/ERC1155LazyMint.sol";

/**
 * @title TravelQuest
 * @dev inherite and using `ERC1155LazyMint` in the our smart contract
 *
 */
contract TravelQuest is ERC1155LazyMint{
    // Total number of NFTs per Bundle Collection
    uint256[] private supplies = [50,50];
    // Total number of NFTs minted
    uint256[] private minted = [0,0];

    // nested mapping to check user can mint only one NFT per NFT Collection
    mapping(uint256 => mapping(address => bool)) public member;

    /**
     * @dev ERC1155LazyMint library's constructor takes four Parameters
     * _name of the NFT, _symbol of the NFT,
     *  _royaltyRecipient (address) who will get a royalty on secondary sale, _royaltyBps (royality percentage)
     * we don't need to set Royality for the purpose of our smart contract. setting _royaltyBps to Zero
     * @param _name: name of the whole NFT bundle Collection
     * @param _symbol: symbol of the whole NFT bundle Collection
     */
    constructor(
        string memory _name,
        string memory _symbol
    ) ERC1155LazyMint (_name, _symbol, msg.sender, 0){}


    /**
     * @dev Mint NFT and also check various conditions
     * 1. One user can mint only one NFT per Bundle Collection
     * 2. Give error if _tokenId is wrong
     * 3. Check and give error if all the NFTs are Minted
     *
     * @param _tokenId: tokenId of the NFT Bundle collection
     */
    function mintNFT(uint256 _tokenId)
        external
        {
         require(
            !member[_tokenId][msg.sender],
            "You have already claimed this NFT."
        );
        require(_tokenId <= supplies.length-1,"NFT does not exist");
        uint256 index = _tokenId;

        require (minted[index] + 1 <= supplies[index], "All the NFT have been minted");
        _mint(msg.sender, _tokenId, 1, "");
        // "" is data which is set empty
        minted[index] += 1;
        member[_tokenId][msg.sender] = true;
    }

    /**
     * @dev Give the total number of NFTs minted per NFT Bundle Collection
     * @param _tokenId: tokenId of the NFT Bundle collection
     */
    function totalNftMinted(uint256 _tokenId) public view returns(uint256){
        return minted[_tokenId];
    }
}
I will explain the code below but before seeing the explanation. I request you to try to understand smart contracts on your own by reading the code and comments.
Let's move to the explanation
Line 1: Specifying SPDX license type, which is added after Solidity version ^0.6.8. Whenever the source code of a smart contract is made available to the public, these licenses can help resolve/avoid copyright issues. If you do not wish to specify any license type, you can use a special value UNLICENSED or skip the whole comment (it will not result in an error, just a warning).
Line 7: Declaring the Solidity version.
Line 13: Importing the thirdweb ERC1155LazyMint contract.
Line 20: Inheriting the ERC1155LazyMint contract in our TravelQuest smart contract. In order to use all the functionalities of ERC1155LazyMint contract.
Line 22: supplies is an array that keeps track of the Maximum number of NFT available to mint.
Line 24: minted is an array that keeps track of how many NFTs are already minted.
Line 27: member is a nested mapping to check user can mint only one NFT per NFT Collection
Line 37: constructor: ERC1155LazyMint library's constructor takes four Parameters
_name: name of the NFT
_symbol: symbol of the NFT
_royaltyRecipient (address) who will get a royalty on a secondary sale
_royaltyBps (royalty percentage).
we don't need to set royalties for the purpose of our smart contract. setting _royaltyBps to Zero.
Line 38: string memory _name: name of the whole NFT bundle collection
Line 39: string memory _symbol: symbol of the whole NFT bundle collection
Line 51: function mintNFT : to allow users to mint NFT from our NFT Bundle Collection. One user can only mint 1 NFT of each NFT collection. Also, check various condition
- One user can mint only one NFT per Bundle Collection
- Give error if
_tokenIdis wrong - Check and give an error if all the NFTs are Minted
_tokenId: tokenId of the NFT Bundle collection
Line 72: function totalNftMinted: is a getter function. Give the total number of NFTs minted per NFT Bundle Collection. _tokenId is the tokenId of the NFT Bundle collection
BOOM You have created our smart contract with custom logic and thirdweb ContractKit.
Deploy our smart contract using thirdweb deploy
Use the CLI to ship our contract directly to any of thirdweb supported networks using their dashboard.
npx thirdweb deploy
Running this command will:
- Compile all the contracts in the current directory.
- Allow you to select which contract(s) you want to deploy.
- Upload your contract source code (ABI) to IPFS.
- Open the deploy flow in the dashboard for you to select one of ThirdWeb supported networks to deploy to.
- You don't need to write your deploy script. Meaning you don't need your
Private Keyto deploy your smart contract, which saves you and eliminates any chance to expose your Private Key.
After running the above command, you will get something like this:
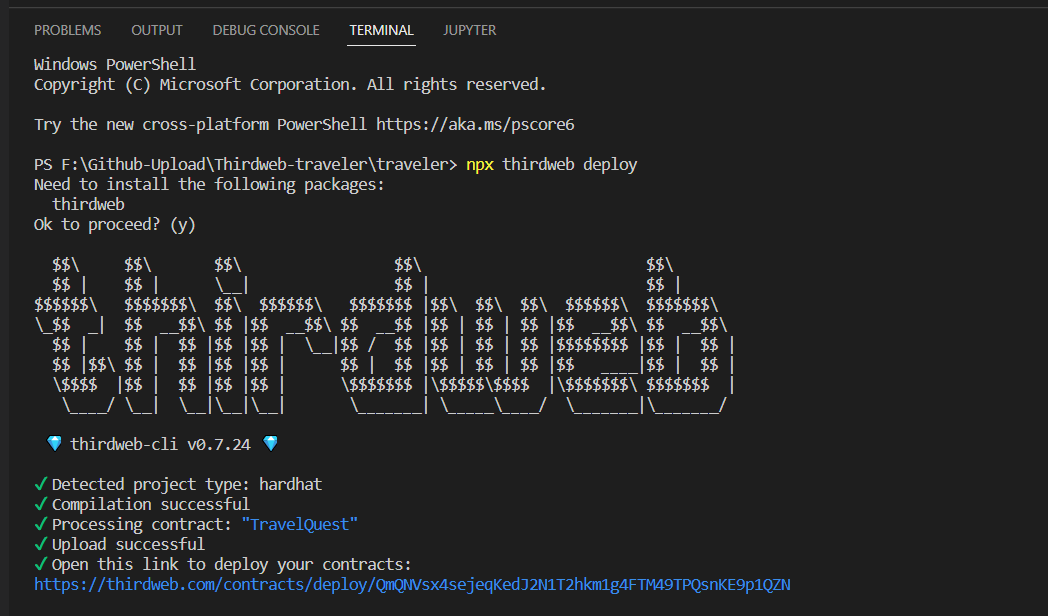
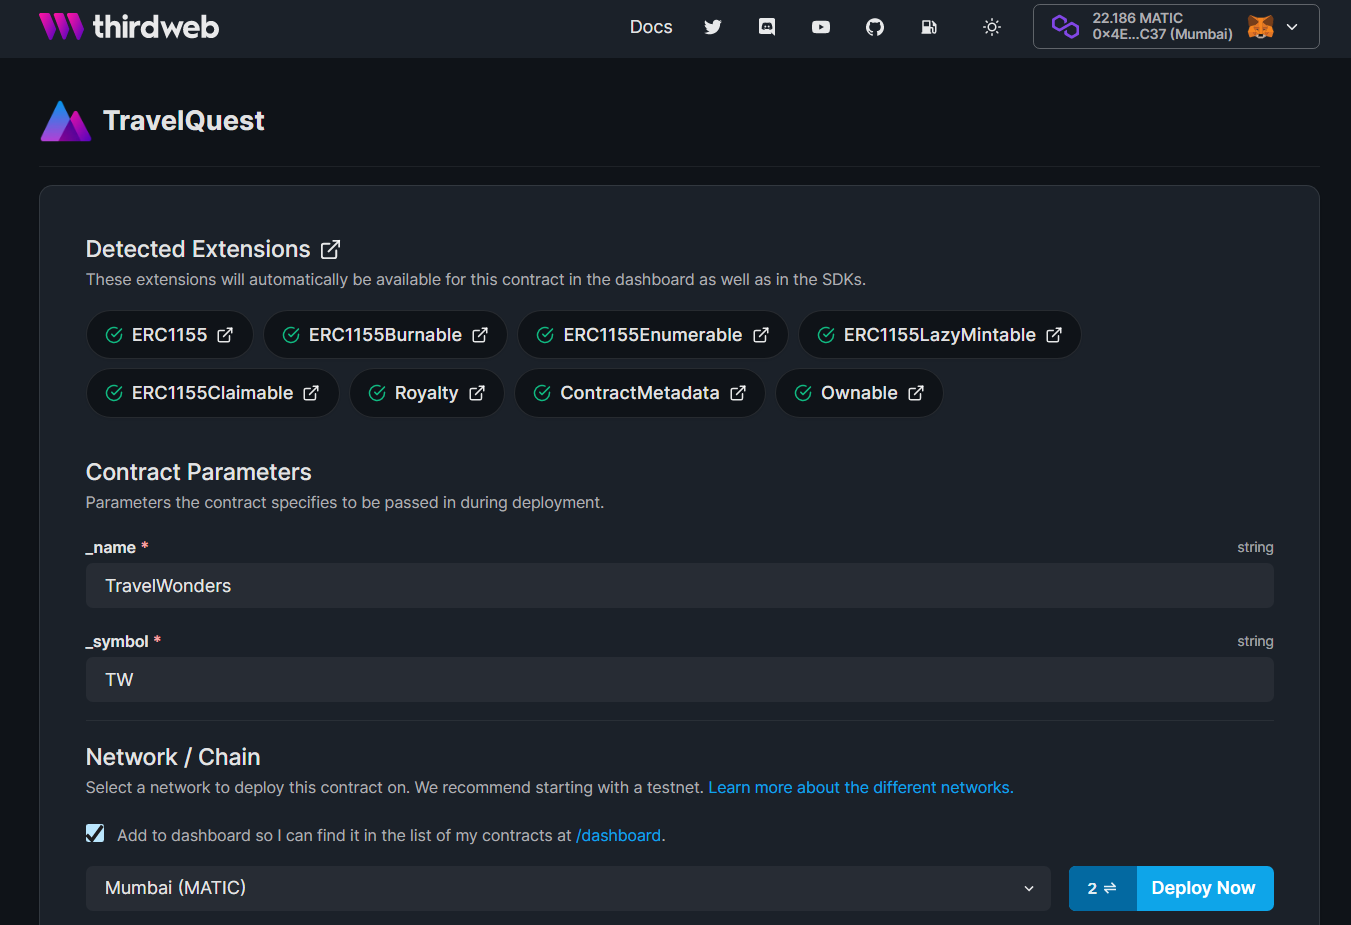
Now click on the link. You will open the Deploy dashboard. Enter the details (Name of the NFT, symbol of the NFT, and network you want to deploy your smart contract) and Click on the Deploy Now button.
After the deployment of your smart contract. You will be navigated to your NFT Collection Dashboard.
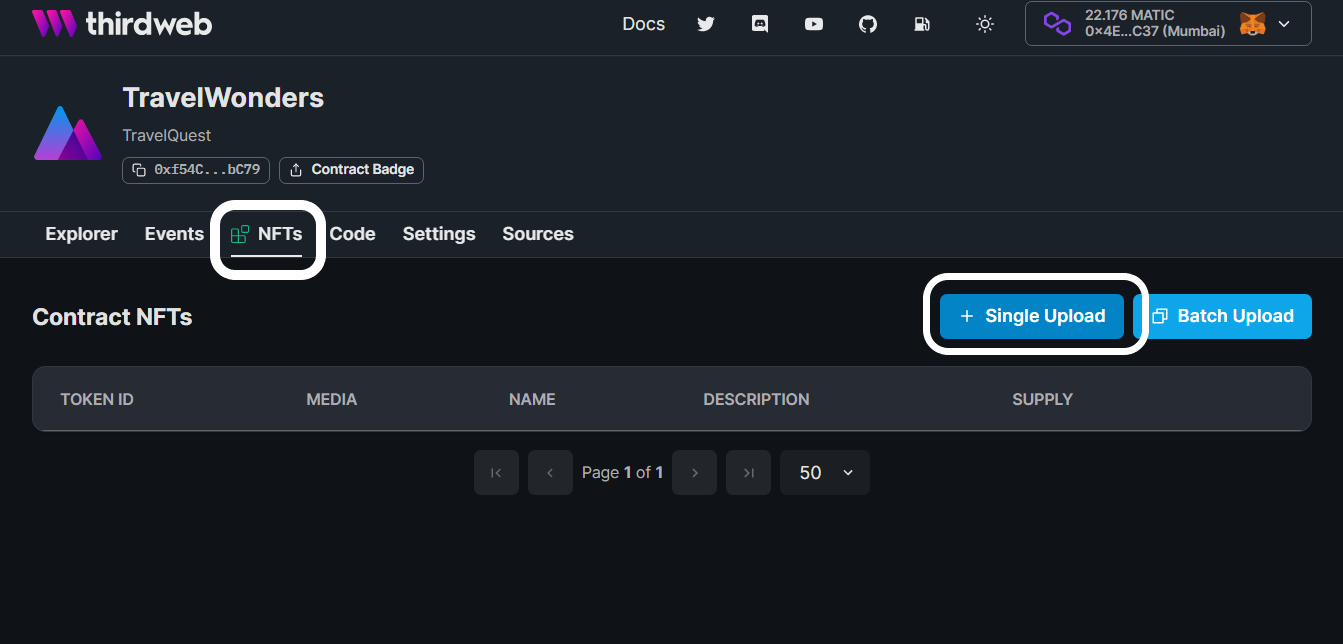
Click on the Single Upload to upload the metadata of our NFT. You can also use Batch Upload, but for this tutorial. Let's stick to the Single Upload.
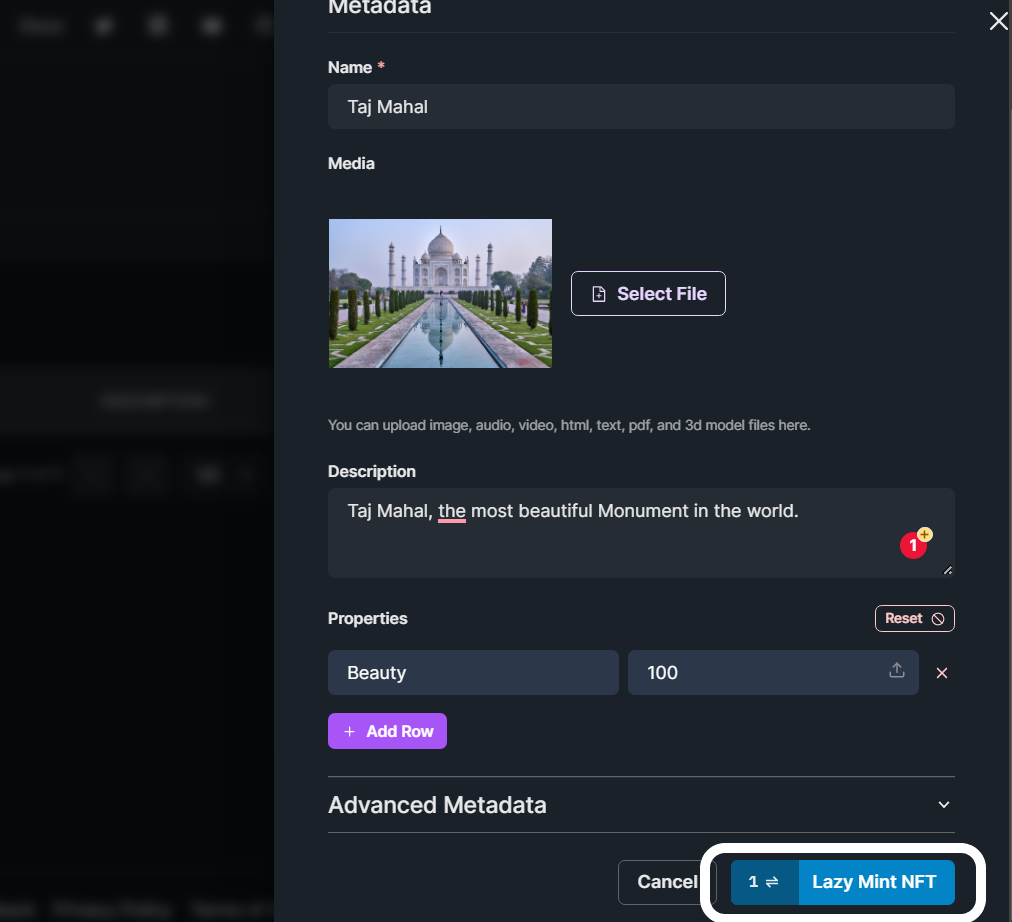
Add the details as shown above and click on Lazy Mint NFT button.
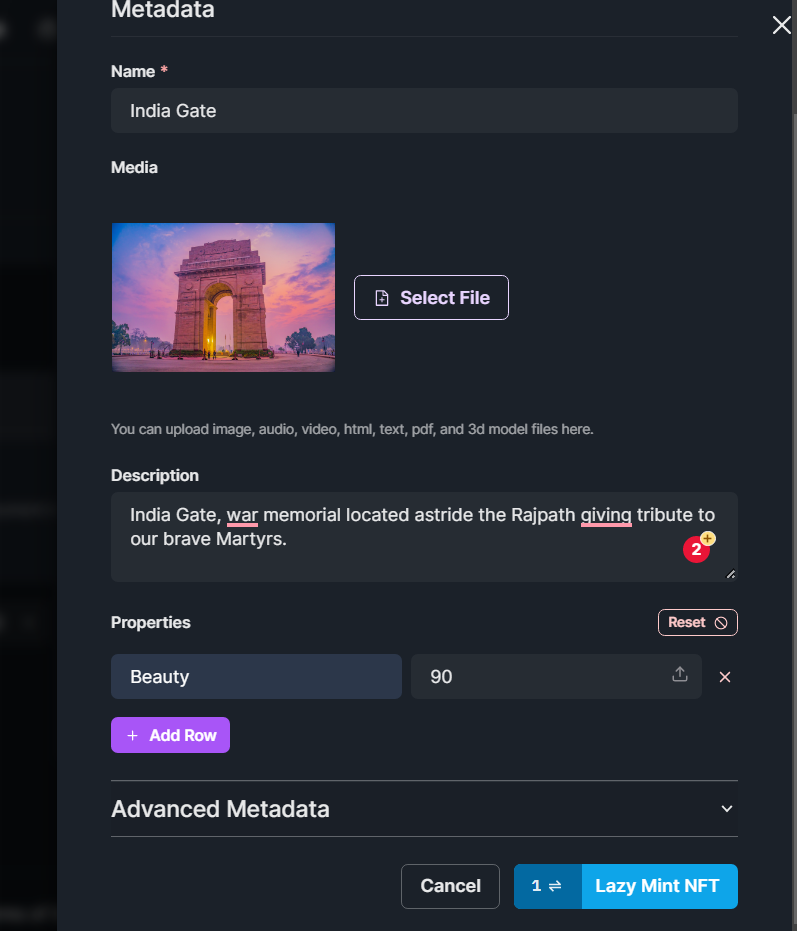
Similarly, let's add metadata for another NFT.
After the addition of Metadata, your NFTs section on the dashboard will look like this.
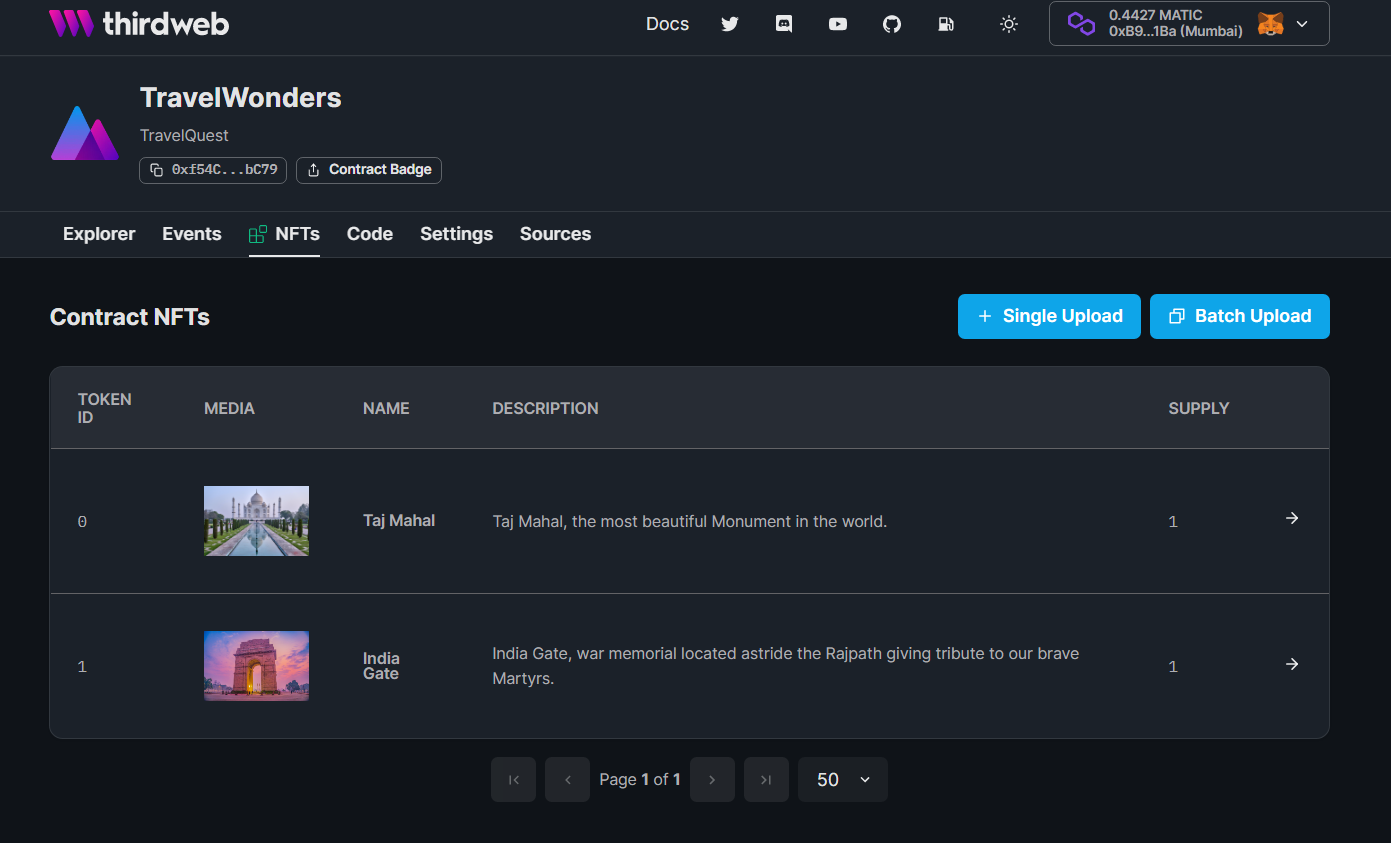
Now that we have our NFT collection along with Metadata on order. Let's mint some NFTs.
Mint the NFT
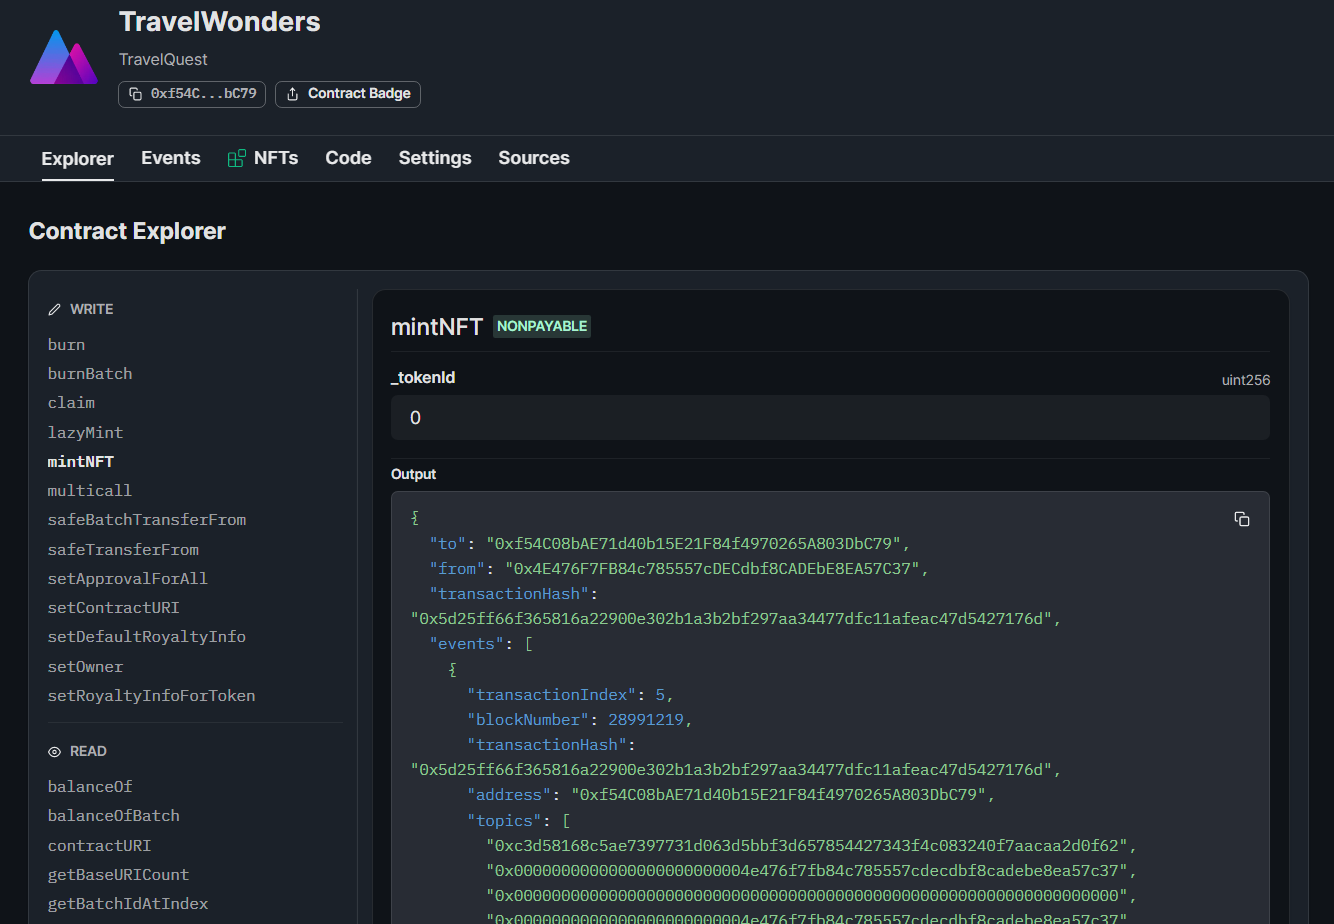
Go to Explorer section of your NFT collection Dashboard. You will be seeing all the functions you can perform. For now, let's just focus on our custom mintNFT function.

Enter the _tokenId (either 0 or 1) and click on Mint button. You will mint the NFT and the dashboard will show all the transaction details.
Copy your contract address and paste the address on Testnet Opensea to view your NFT with metadata.
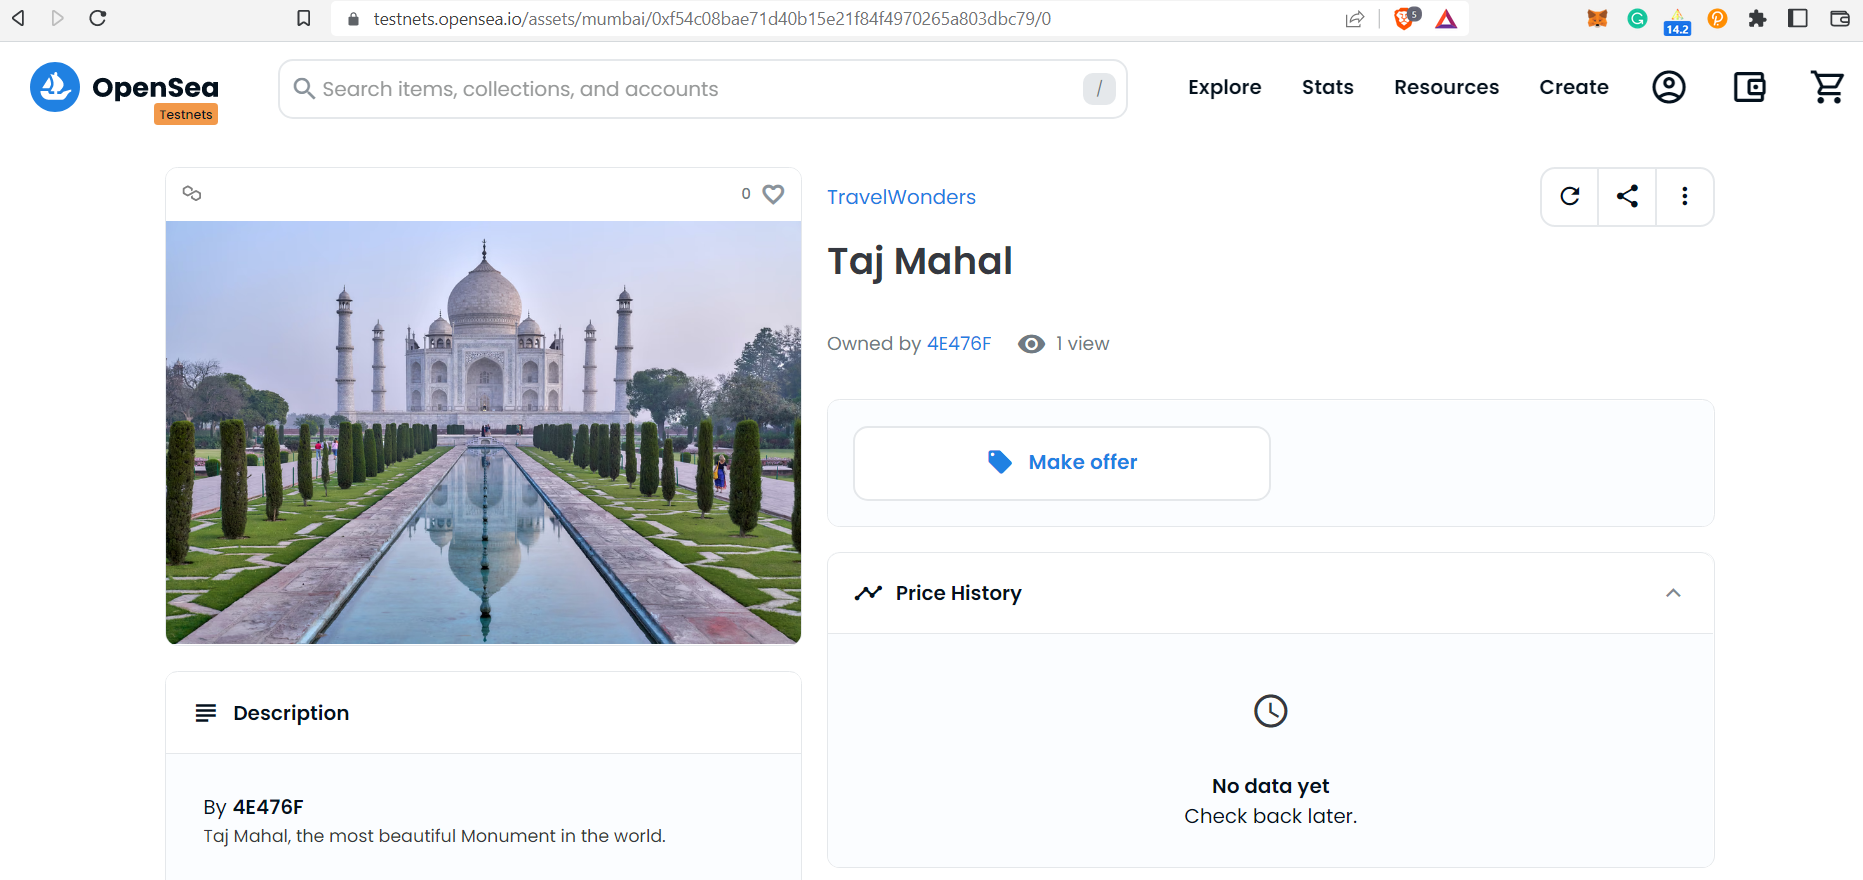
You have successfully minted the NFT and viewed it on opensea. You can share link of opensea and brag about NFTs like all web3 native people do 😎.
Check Custom Errors
You can have successfully minted the NFT. Now let's check the custom errors we added in our smart contract.
Wrong TokenID
Enter any wrong _tokenId in mintNFT function.
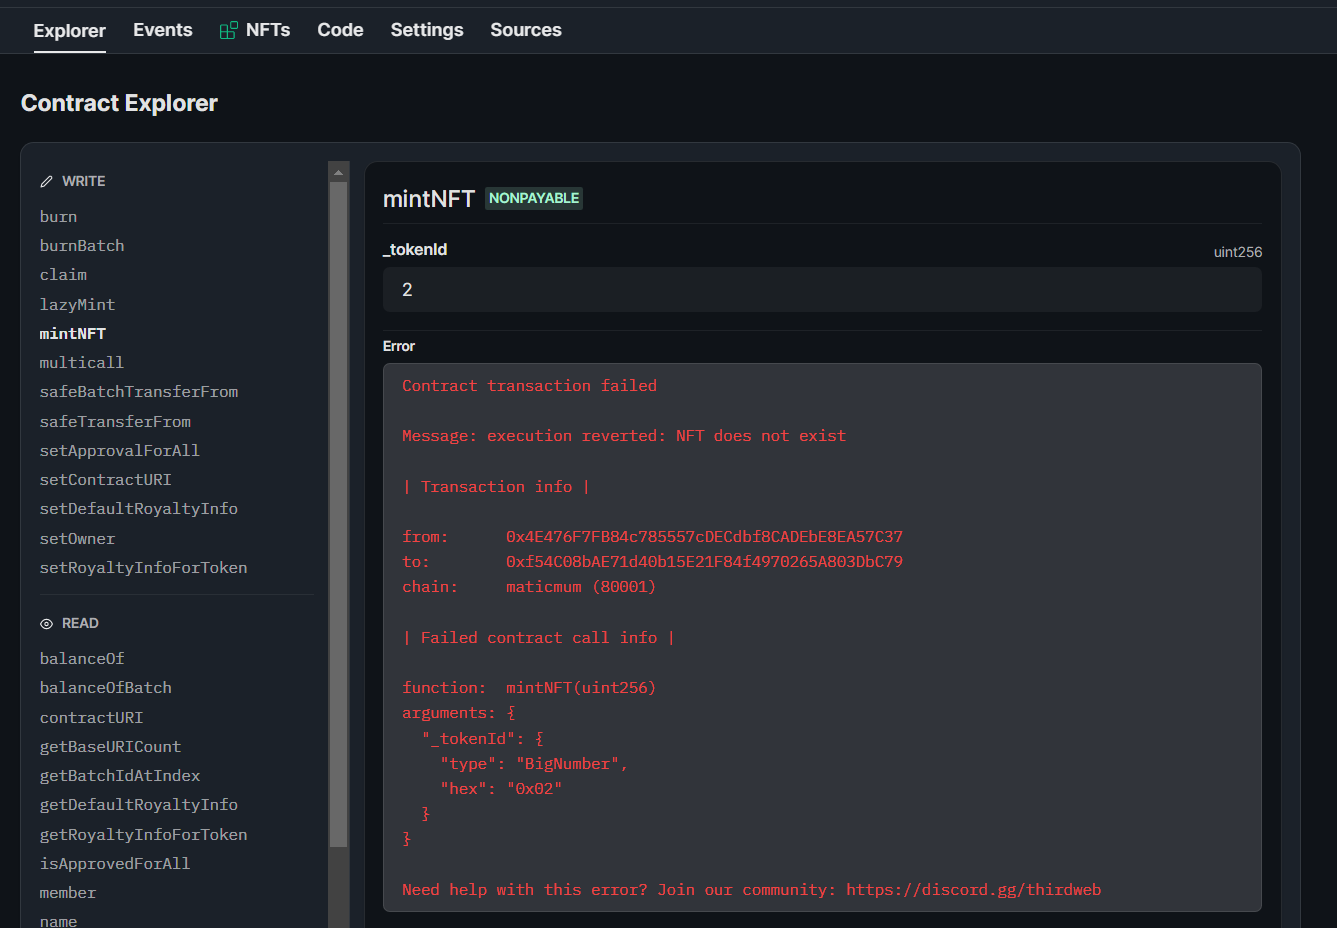
You will see this well-defined custom error with all details.
Already Claimed
Try to mint the same NFT with the same wallet address.
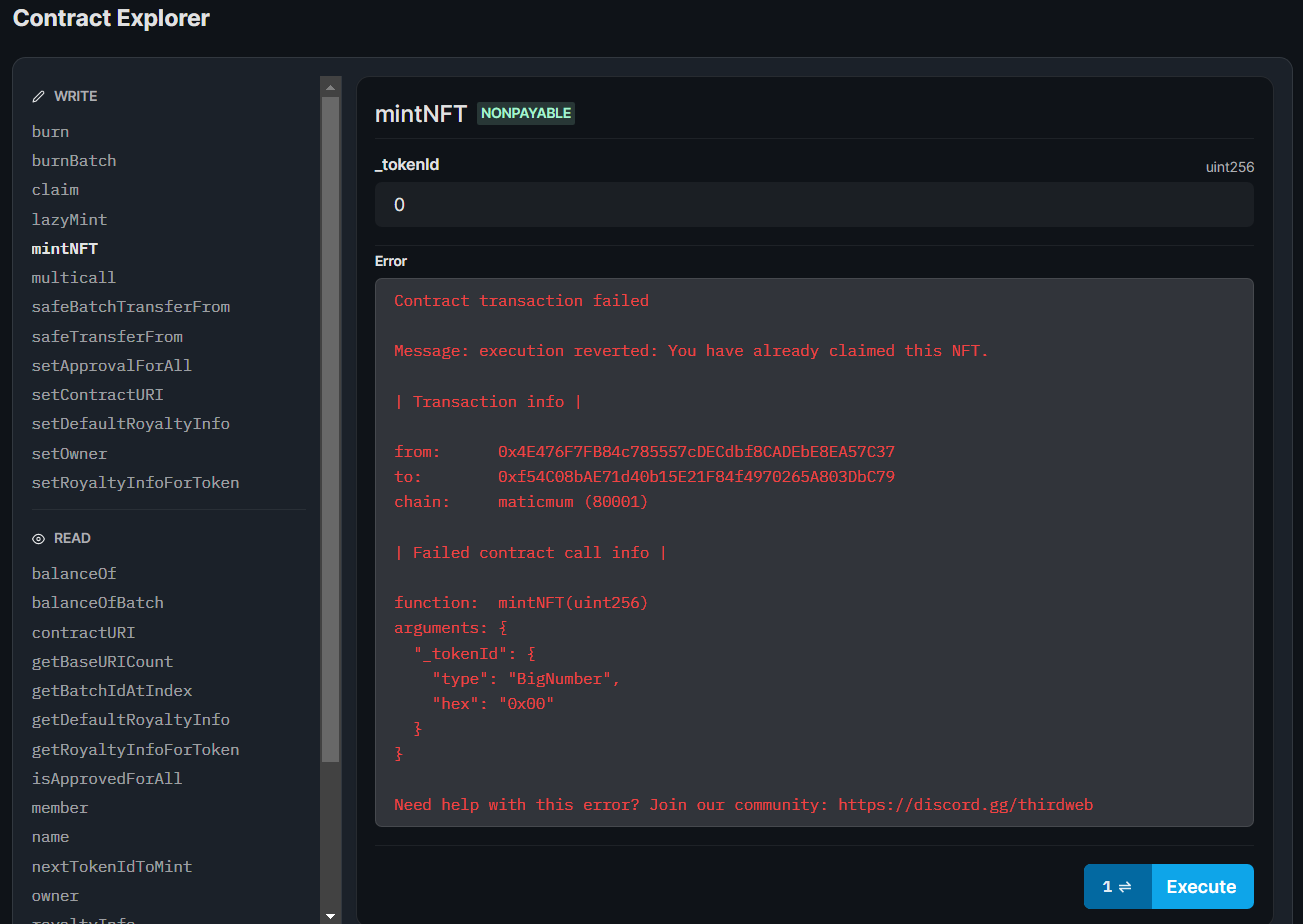
Again, you will see this well-defined custom error with all details.
Getter Function
We have already seen how we can access and use the setter function in ThirdWeb. Now we will interact with the getter function. You can access the getter function by scrolling down on the explorer page and clicking on your custom totalSupply function.
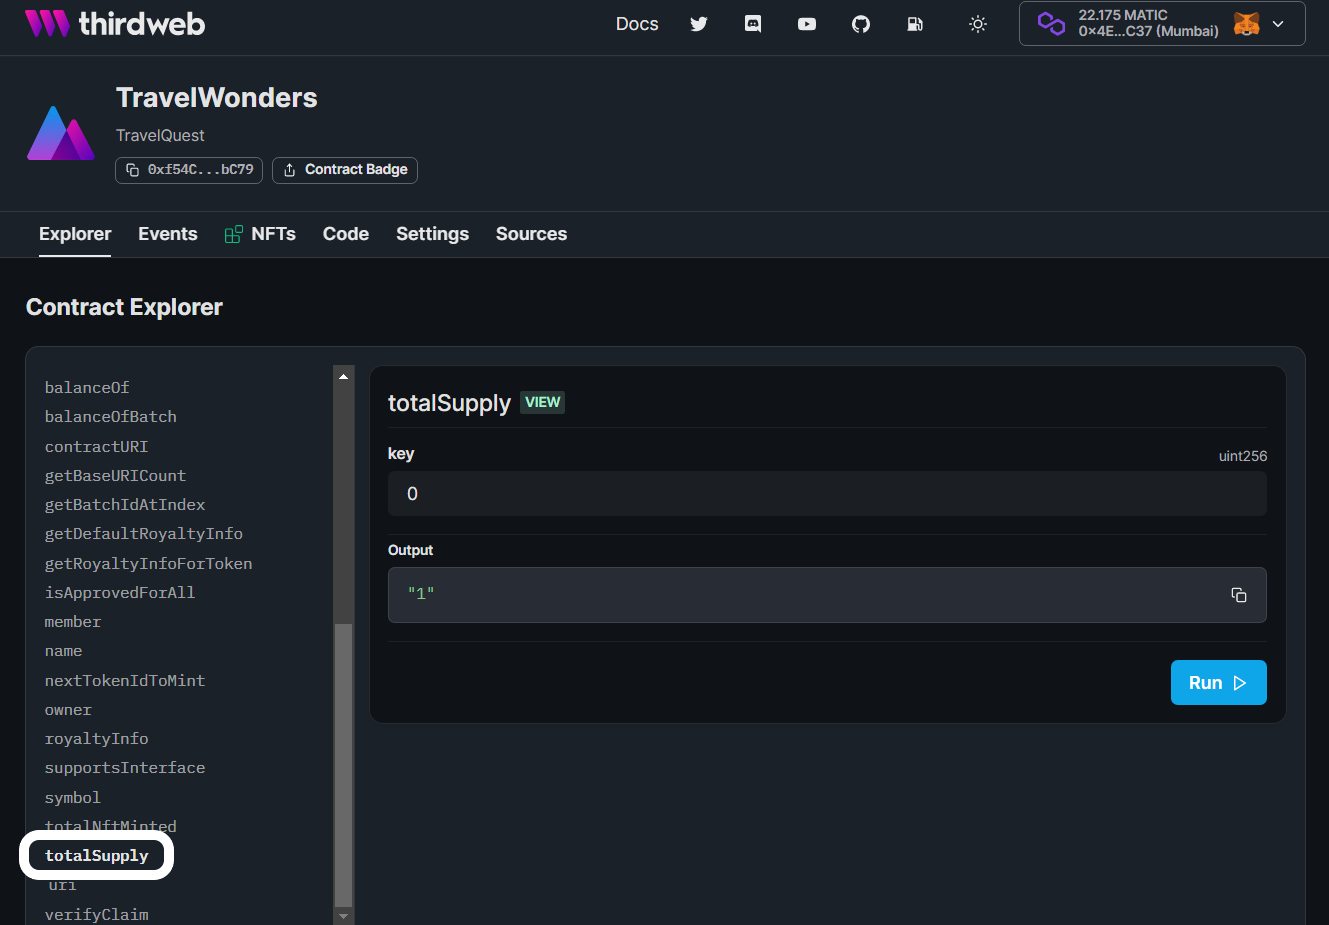
You see you are getting the right result.
🎉BOOM 🎉
You have completed the whole tutorial. Give yourself a pat on the back. You have learned about:
- ERC-1155 token standard
- Build your own custom smart contract using
thirdweb contractkit - Deploy your smart contract using
thirdweb deploy - Store your NFTs metadata in IPFS using
thirdweb dashboard - Mint your NFT and interact with your smart contract using the
Explorersection ofthirdweb dashboard
Simply WOW
If you learn and enjoy this article. Please share this article with your friends. I hope you learned something new or maybe even solved a problem. Thanks for reading, and have fun!
You can follow me on Twitter, GitHub and Linkedin. Keep your suggestions and comments coming!
WAGMI 🚀🚀


